SALT-GLAZING

Salt-Glazing is great for falling snow. It isn’t a technique I use often (in fact, I always say use special effects sparingly – they create more impact that way), but when I do, I always find it enjoyable.
Quite simply, you sprinkle salt onto a damp wash (it shouldn’t be too wet – more, a sheen), and leave it to dry. Sea-salt is best, as it comes in random, natural-looking shapes, which when applied to a wintery sky can resemble convincing-looking snow-flakes. I also prefer to use the salt that comes in flakes as opposed to crystals, since these can be broken up further between your fingers – try the same with crystals and you’re likely to rip your fingers apart!
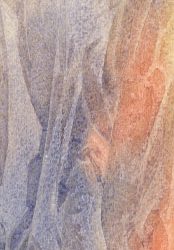
As the salt sits on the surface of the damp wash, it soaks up the moisture from around it, which, in turn, creates a pattern on the paper. The size of the pattern will depend very much upon how damp the wash is when you apply the salt. The earlier you drop the salt onto it, the more moisture it will soak up, and so the larger the pattern. As always in watercolour, timing is crucial to the success of this technique – for snow, I recommend leaving the wash just a minute or two longer, so reducing and controlling the size of the resulting pattern.
Of course, salt-glazing doesn’t only have to be used for snow. It is a brilliant texture-technique, ideal for creating random textures anywhere it’s needed; in foreground undergrowth, for instance, or on the surface of tree-bark.
You should allow the paper to dry thoroughly before attempting to remove the salt. Brushing it off whilst it is still damp will create unsightly smears across the surface of the wash. To be sure, it’s best to turn the paper over completely and tap the board on the back to remove the largest flakes first. A quick blast with a hairdrier will ensure everything is completely dry before removing the rest.
‘Let it snow, let it snow, let it snow’.