WATERCOLOUR PENCILS
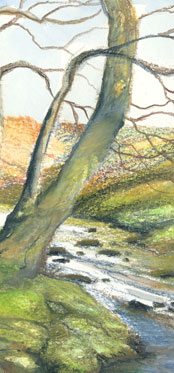
This month, I’d like to just run through a few techniques for getting the best out of those watercolour pencils you’ve had kicking around for ages and not quite got around to using. It’s a medium that I personally have a bit of a love-hate relationship with, mainly because often when I’ve tackled a picture using watercolour pencils, I’ve only had rough paper to hand. If you’re going to use them, I strongly recommend that you use Hot-pressed (smooth) paper. Rough paper, whilst great for achieving texture effortlessly, is a nightmare when it comes to using water-soluble pencils – the two just don’t mix very well! Here, then, is my short list of techniques for this often over-looked medium:
[1] Hatching and Cross-hatching. Since Watercolour pencils are primarily a drawing tool, basic drawing techniques apply. Hatching (parallel lines drawn closely together to create a tonal area) and Cross-hatching (two sets of parallel lines drawn across each other at an angle) are the standard shading methods we use when drawing with ordinary graphite pencils.
[2] Frottage. This is the creation of texture by placing your paper over a rough surface (such as wood or stone). Bit like brass-rubbing, I guess.
[3] Bracelet Shading. To successfully explain, in visual terms, what shape an object is, shading should follow its contours – often referred to as Bracelet Shading (a drainpipe, for instance, should be shaded-in using lines that are tightly curved to give it a three-dimensional effect. A gentle slope, in a landscape would have be made up of broader curves, similar to a contours on an ordnance survey map.
[4] Gradation. This is a smooth transition from a dark to light tone, or vice versa, or from one colour to another. Variations in tone can be controlled by altering the pressure applied with the pencils.
[5] Scraping. This is a great way of producing some spectacular textural effects. Scrape the point of the pencil with the edge of a craft blade or scalpel, over a pre-wetted area on your paper. As the tiny scrapings hit the moisture, they fan out in an interesting an unpredictable way.
[6] Overlaying. Watercolour pencils really come into their own if you overlay colours, gradually, on top of each other. This is an effective way of creating a wide range of hues, from a limited number of colours, and can produce a considerable amount of depth and tone.
[7] Wash Effects. Colour can be taken straight from the point of the pencil with a damp brush, then applied direct to the paper as you would with watercolour pans or tubes. This makes watercolour pencils a convenient sketching tool, when out of doors. They are also ideal, when used in conjunction with the Pentel Waterbrushes.
[8] Burnishing. Burnishing is the mixing and lightening of adjacent colours using a white watercolour pencil.